There are a number of basics to playing banjo that apply equally to plectrum and tenor banjo.
Standing vs. Sitting
For a number of reasons I do not (and in fact I generally refuse to) play while standing. The main reason is that each of my resonator-backed banjos is heavy and I have had back problems for 30 years. In addition, I have recently been plagued with a pinched nerve in my neck from my banjo strap over my left shoulder. I previously used the strap even when sitting to keep the banjo from sliding off my lap. I now place the strap around my back, which works just as well.
A secondary reason is that when standing the banjo head is practically vertical making it very difficult for me to strum comfortably and without cramping my forearm. Standing position also makes the fingerboard difficult to see, although purists would tell you that you shouldn’t have to be looking at the fingerboard anyway. But, no matter – if you are comfortable playing while standing, go for it!
Holding The Banjo
I always hold the banjo with the head at slight angle, not absolutely vertical, between my legs, with the neck at about 45º as you can see in this recent image below. This position allows me to see the fingerboard easily when necessary and keeps my forearm more free.
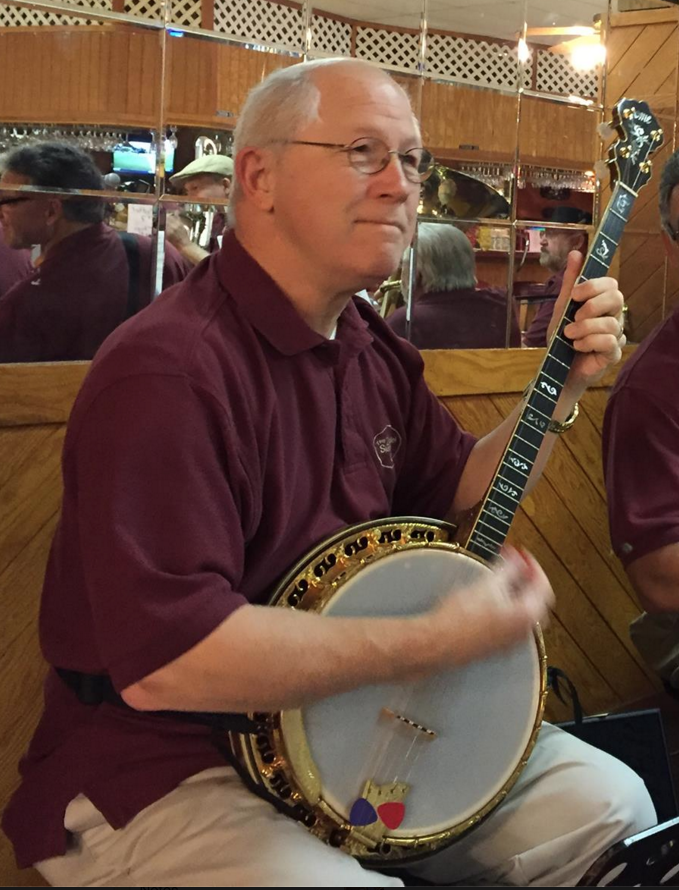
Some players find it more comfortable to rest the banjo on their right leg (assuming right-handed players) rather than between the legs. However, for me at least, the banjo is less stable in that position and the neck tends to fall or rotate clockwise, so I prefer to hold it between my legs as shown here.
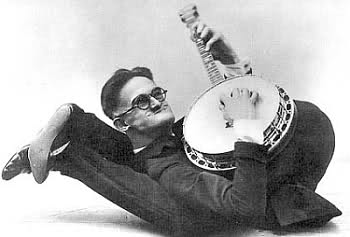
The position below is not recommended.
Picks and Holding Them
The plectrum and tenor banjos are normally strummed using a flat pick. Flat picks are available in a range of thicknesses and various sizes, shapes and compositions. Most players I know use nylon picks now because they are durable and flexible. I am particularly fond of nylon picks with the “cats’ tongue” rough surface that prevents them from slipping. One brand of these, Snarling Dogs Brain Picks, are great—they virtually never slip out of your grasp. My preferred thickness is the “purple” colored one (.60mm) or sometimes the “red” (.73mm).
Old-style celluloid picks frequently crack and break. They also wear down more quickly than nylon and, at least in my experience, get nicks along their edges that tend to catch the strings and often cause them to break. I used to break two or three first strings a night with celluloid picks. Since nylon picks were introduced and I switched to them I think I have broken only two strings in at least a dozen or more years!
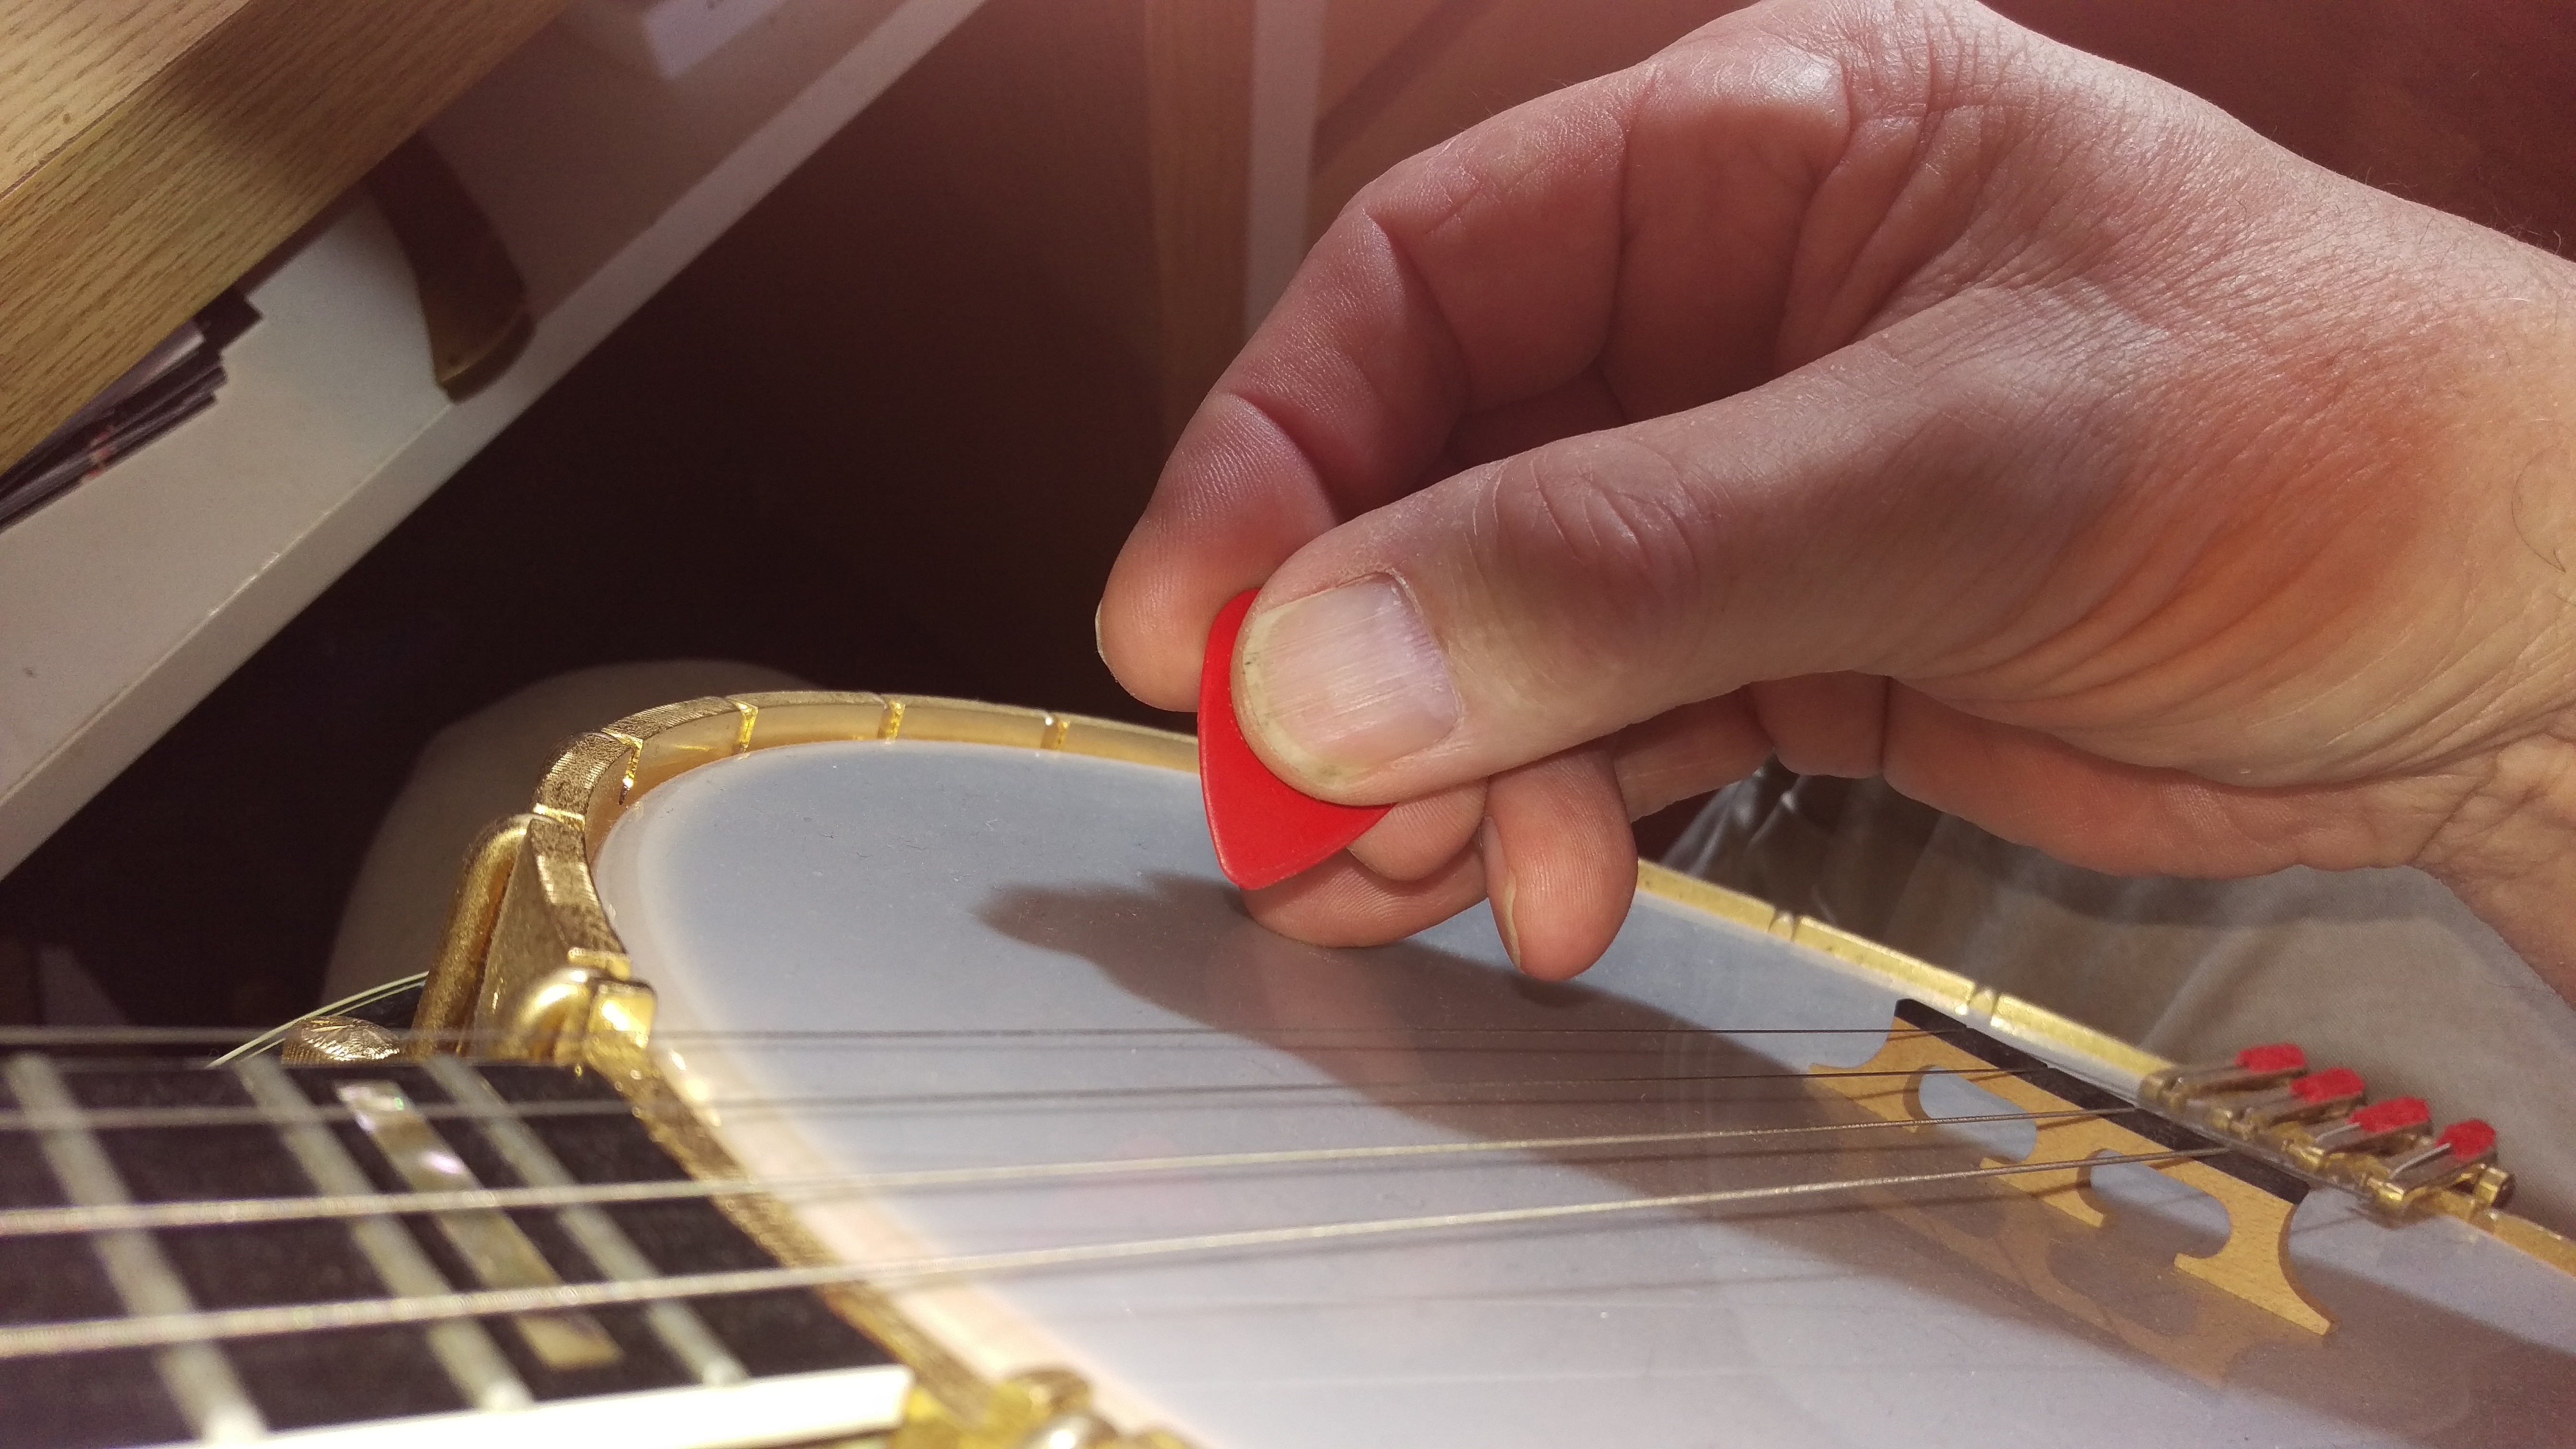
I hold my pick between my thumb and my first two fingers with my pinky finger slightly extended and sometimes dragging, not anchored, on the head of the banjo. The pinky acts as a kind of “depth gauge” to prevent my hand from digging into the strings too deeply.
Many instructors and instruction books recommend against the way I hold the pick claiming that it inhibits the proper movement of the pick-holding hand at the wrist. For me, this “3-point” method allows me to hold onto the pick much more securely, preventing it from slipping from my grasp and flying away somewhere on the stage in the middle of a tune—very disconcerting!
The Left Hand (for righties)
For some reason, while I was just walking the dog at 11:15pm, I realized that I had not mentioned how to hold the left hand (for right-handed players). It is very common for beginners to grab the neck so that their palm is actually in contact with the neck. This is a really bad habit to get into because it almost completely prohibits your fingers from pressing the strings down cleanly and allowing your hand to move freely.
The correct left-hand position is hard to describe, but basically you should aim to place your thumb perpendicular to the underside of the neck and have your four fingers arched over the fingerboard with the thumb in the general vicinity of halfway between the first finger and the pinky, at least for most chords. It is almost like you are “pinching” the neck, not “grasping” it with your whole hand. With all the willpower you can muster, keep your sweaty palm away from the neck! You will be happy you did in the long run.
Plectrum Banjo Tuning
One of the most common problems faced by a player, especially a beginner, is to get their instrument tuned properly. If the banjo is even slightly out of tune it will sound really lousy, especially if you are playing with other people, like in a band setting for example. The best advice I have is to get an electronic tuner that clips on the peghead or, if you have a smartphone, download one of the many tuner apps. My favorite is the “n-Track” available for Android and iPhones.

The plectrum banjo is tuned, starting with the lowest pitch, “thickest” (4th string) “C G B D”. This is called “C” tuning and is the same as “C” tuning on a 5-string banjo (without the 5th string). Playing the open strings produces a “G” chord with strings 3, 2, and 1 (G B D) but with a “C” in the bass, which makes the open-string tuning a bit weird because “C” doesn’t belong in a “G” chord.
By the way, the normal nomenclature is to spell the strings out in that order—4, 3, 2, 1 with the 4th string being the lowest in pitch. It is as if you are looking directly at the fingerboard and the strings are read left to right.
C G B D Tuning
 Tuning the open strings is one challenge for the beginner. Another is having the banjo in tune all the way up the fingerboard at each fret.
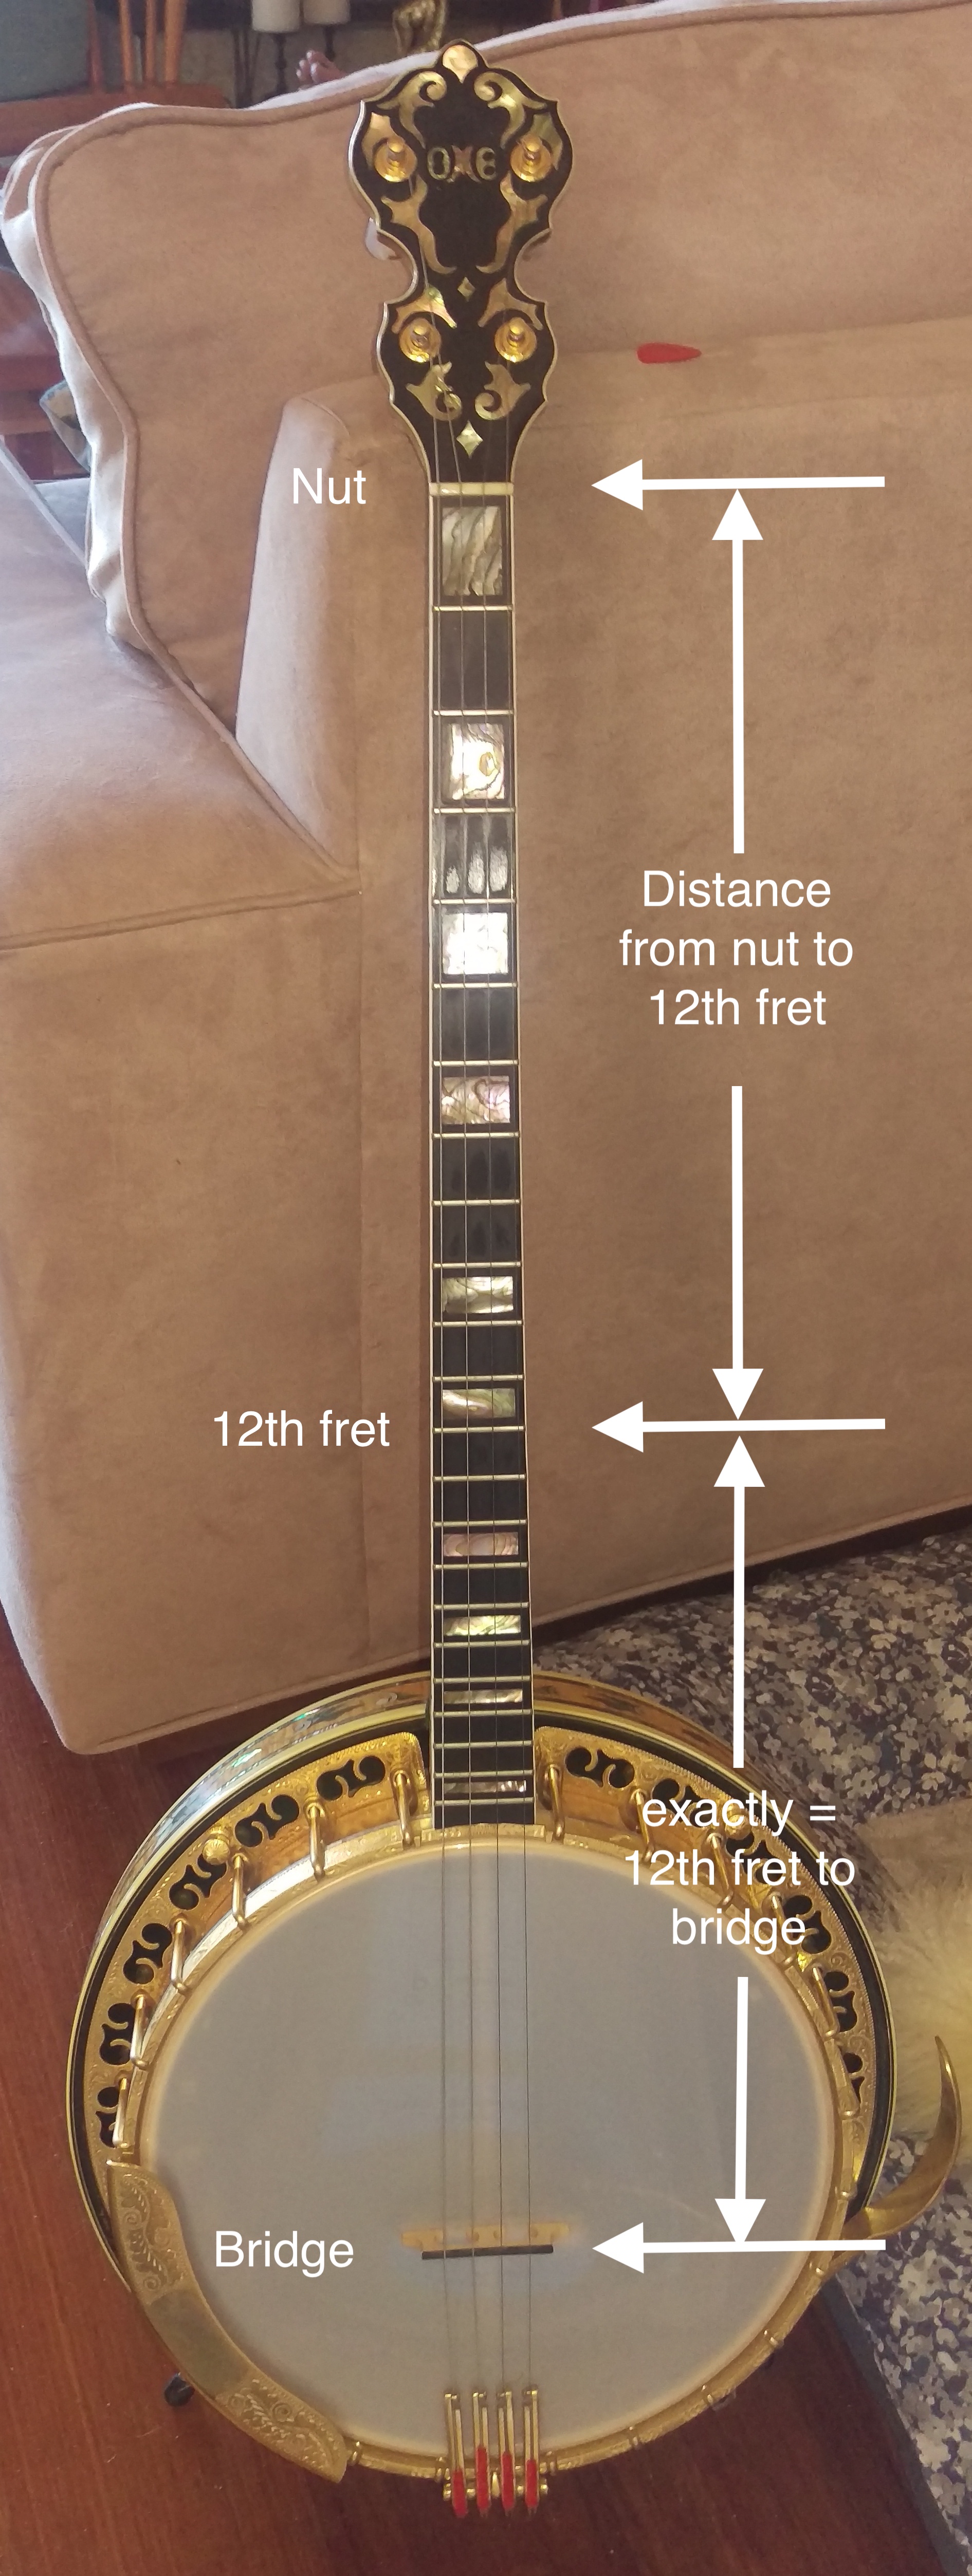
From your probably long-forgotten Physics class, cutting or shortening a vibrating string in half doubles the frequency. In music, this doubling of the frequency is called an “octave”. Western music is based on a 12-tone per octave scale, thus playing a note at the 12th fret should cut the string exactly in half to produce an in-tune octave. The banjo nut and 12th fret are fixed in position so the only movable item of the three is the bridge. Making sure the bridge is placed properly guarantees good tuning. The image to the left shows this relationship (except, because of the camera’s perspective, it doesn’t look quite like it).
Determining whether to move the bridge forward (toward the nut) or back is a little hard to describe in words, but here goes:
Holding the banjo in your normal sitting position, just barely touch the 1st string directly above the actual 12th fret (not the 12th fret space). When you pluck the string with your finger there, you should hear what is called a harmonic that should exactly match the pitch of the note played normally by fretting at the 12th fret space. If the harmonic is higher in pitch than the fretted note, move the bridge slightly back toward the tailpiece and test for a match again. If the harmonic is lower in pitch, move the bridge slightly toward the nut and re-test.
Another way to test the bridge position, but only if you have a really good sense of pitch, is to play a “C” chord down at the nut and play the same “C” chord shape at the 12th fret. Again, if you have a good sense of pitch, you should be able to tell if the higher chord is an octave above the lower one. If it is too high in pitch, move the bridge back, too low in pitch move it forward toward the nut.
There are a few other things that may determine whether the banjo is in tune everywhere on the fingerboard. A very high “action,” especially with heavy strings, can be a problem because the very act of pressing down all the way to the fingerboard stretches or tightens the string enough to throw the pitch off. Moving the bridge to compensate might help a bit, but lowering the action is a better solution if possible. If a high action is required to prevent strings from “buzzing” on the frets, you might want to consider investing in a better instrument if you can afford it. Your fingers will thank you.
Next: Plectrum Banjo Chords
![]()
If you find these lessons helpful, especially if you are using them as a teacher for instruction, please consider making a PayPal donation—of any amount—to help keep them coming! |