GridTool and GrayScaler for Mac and Windows
(After purchase you will be directed to a page to select which operating system (Mac OSX or Windows) version you need)
Introduction and History
I recently wrote and published an Android software tool for fine artists called “ArtTools” that allows you to get the RGB, CMYK and gray values of any pixel or grid of pixels in an image and also will draw user defined grids over the image. For the history and reasons for writing ArtTools, you can read about it here. Having ArtTools running on my Android tablet while I am painting has been extremely handy for accurately judging values and color when mixing colors. However, I realized that being able to run ArtTools on a Mac or Windows desktop or notebook would be a good idea.
I had to “port” the Android version to something that would run on both Mac and Windows and the easiest way to do that was to use the cross-platform Java programming language and Swing components (like buttons, panels, etc.). Since Android ArtTools is written in an Android-specific version of Java, the conversion to Mac and Windows compatible code was relatively straightforward.
ArtToolsJSw (the “JSw” stands for Java using Swing components) is written in the Java language that is “cross-platform” meaning that programs written in Java are able to run on both Mac OSX and the Windows operating systems. The beauty of Java is that it only requires a single set of program code files and the result looks and runs just like a normal program on either operating system.
The only requirement for this is that the machine a Java program runs on must have the Java Runtime Environment (JRE) installed. If you do not have the latest JRE (jre-8 at this time) you can download it free from Java’s home company, Oracle, here:
https://www.oracle.com/java/technologies/javase-jre8-downloads.html
The JRE is free to download and free to use and should only take a very few minutes to install. Be sure to choose the correct version for Mac or Windows.
ArtToolsJSw How-To
The main window of ArtToolsJS is very similar to the Android version. The main differences are the addition of a few new tool buttons and the buttons’ positions on the toolbar as well as a splash window on the startup screen. Also, a couple of features are different because of the lack of a touch-screen on most desktop computers as well as the presence of a mouse/trackpad and keyboard.
The Startup Window
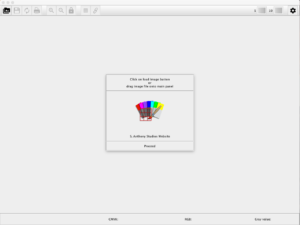
The startup window with the “splash” window tells the user, especially for the first time the program is run, that they can either open an image using a standard open-file dialog or by dragging an image onto the central panel. The “drag to open image” operation is not immediately obvious and is much more convenient than opening a file using a open file dialog.
The “S. Anthony Studios Website” is a link to this page.
“Proceed” just closes the splash panel.
Load Image
![]()
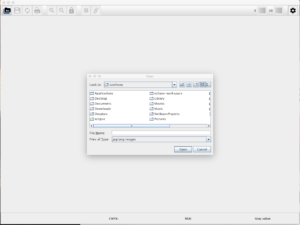
Images may be dragged onto the central panel or opened using a standard file open dialog as shown below. You can open a file or drag an image file onto the image panel at any time and it will replace the existing image.
Display RGB, CMYK and Gray Values
Of course, one of the main reasons for writing this app was to display the RGB, CMYK and gray values of a pixel (or grid of pixels) in an image. The desktop version provides a number of methods for doing this:
Clicking the left mouse button displays a small “target” cross-hairs box centered on the mouse pointer and the corresponding values in the Info Bar below the image. (first image).
Clicking the right mouse button also displays the target as well and shows the values in the Info Bar, but also a popup with the same information (second image).
Holding either SHIFT-key on the keyboard (not available on the Android version) down immediately displays a small box above the mouse pointer showing the color at the tip of the pointer (third image) and continues showing it as you move around the screen (third image).
Note: The mouse pointer is not visible in any of the screenshots because the pointer floats above all windows in a separate layer.
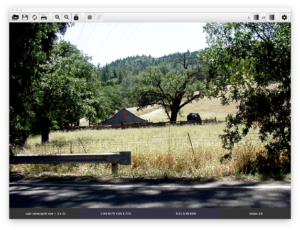
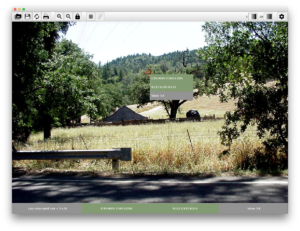
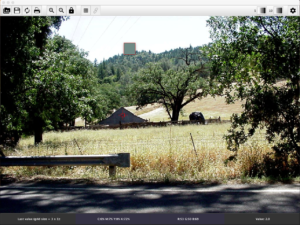
Note: The three types of pixel color display work whether or not a grid is showing.
Zooming and Panning
- Zoomed-in up to 5 times it’s actual bitmap size using the Zoom-in Button.
- Zoomed-out down to approximately 0.4 times it’s actual bitmap size using the Zoom-out Button. This is not terribly useful, actually.
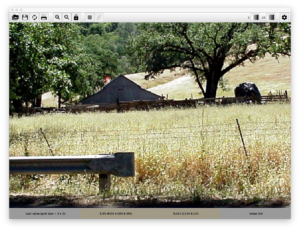
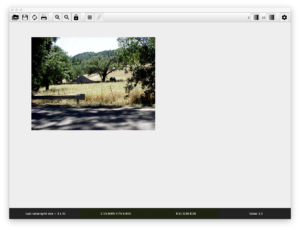
In addition the image may be panned in all directions by dragging with the left mouse button down.
The initial zoom level (scale) of an image depends entirely on the width of the window. When an image is opened it is “fit” to the width of the current app window and the scaling is calculated. By dragging the right or bottom-right corner to enlarge the working area, the image will expand or contract entirely dependent on the app window width.
Restore Original Image
![]() After zooming, panning, converting to grays, etc. it may be desirable to go back to the original unaltered image. This button is just provided as a convenience.
After zooming, panning, converting to grays, etc. it may be desirable to go back to the original unaltered image. This button is just provided as a convenience.
Save and Print
![]()
![]() You may want to save and/or print the image that is displayed in the working area after converting to gray or binding it with the current grid.
You may want to save and/or print the image that is displayed in the working area after converting to gray or binding it with the current grid.
Lock and Unlock Image
![]()
![]() Locking the image is very useful to prevent changes in zoom level and position once you have things set up the way you want, especially when a grid is showing. Binding the grid is a somewhat more permanent prevention measure.
Locking the image is very useful to prevent changes in zoom level and position once you have things set up the way you want, especially when a grid is showing. Binding the grid is a somewhat more permanent prevention measure.
Settings Dialog
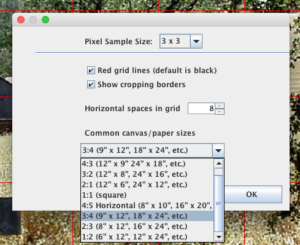
![]() The Settings Dialog provides a number of grid settings as well as the pixel sample size. These settings are saved in an app-specific preferences file so that subsequent runs of the app will have the same settings until they are changed.
The Settings Dialog provides a number of grid settings as well as the pixel sample size. These settings are saved in an app-specific preferences file so that subsequent runs of the app will have the same settings until they are changed.
Pixel Sample Size
It is impossible to zero in on a single pixel on a very high-res image. For this reason, you can select from (currently) three different sample sizes:
-
- 1 single-pixel at mouse pointer
- 3 X 3 grid centered on mouse pointer
- 5 X 5 grid centered on mouse pointer
Grid Settings
-
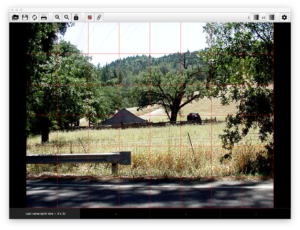
- Checkbox to select whether or not to show the “cropping” borders based on the aspect ratio selected (see image above).
- Checkbox to select red grid lines. This is useful for placing a grid over very dark images when black (default) grid lines are difficult to see (see image above).
- Choose an “aspect ratio” for the cropping border (if checked above). The aspects are calculated using common canvas sizes and shapes starting with “portrait” (vertical) shapes down the list to square then “landscape” (horizontal) shapes. The ability to set custom sizes will probably be added in a future version.
Show and Hide Grid
![]()
![]() Clicking on the Grid Button displays the grid based on selected parameters from the Settings Dialog. Grids are particularly useful for manually transferring an image to canvas or paper. They allow you to more accurately render lines and shapes because relationships are more easily judged one square at a time.
Clicking on the Grid Button displays the grid based on selected parameters from the Settings Dialog. Grids are particularly useful for manually transferring an image to canvas or paper. They allow you to more accurately render lines and shapes because relationships are more easily judged one square at a time.
Note: The grid spacing will be different depending on whether the cropping borders are showing vs. not showing.
Bind Grid to Image
![]() This operation requires some explanation followed by experimenting.
This operation requires some explanation followed by experimenting.
Here is a scenario where binding the grid to the image is essential:
- Suppose you have a grid showing with the desired cropping on top of the underlying image that has been zoomed and panned to the desired position.
- Now, you would like to be able to zoom to a level to focus in on a particular square of the grid.
In this case, since the grid is not yet bound to the image, zooming in will zoom the underlying image but NOT the grid since the two are not yet connected. That is, the grid is being drawn in a different “layer” on TOP of the image, not on the image itself. Binding the grid to the image actually draws the grid on the image itself so they both will scale up and down together.
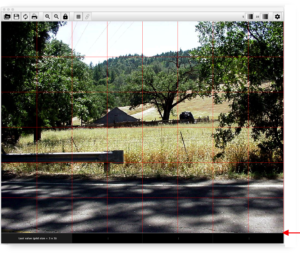
Note: It is important that the app window be sized so that the bottom of the image lines up exactly with the top of the Info Bar for this to work correctly. You will need to drag the bottom right corner of the app window until the gray area outside the image appears. Then adjust the height until the gray background disappears to line them up. Note the arrow at the bottom-right of the screen. If any gray background is showing then the window is too tall. Once this is done, click the Bind Button.
If this adjustment is not made, the grid squares and the underlying image will be distorted.
Also note: It is possible to bind the grid to the image and then display a grid on top of the resulting bound image, but this can be very confusing and it is not recommended. The Android version of ArtTools disables the Grid Button if a bound image is displayed, but I have left the button enabled for the time being.
Convert to Grays
3 ![]() 5
5![]() 10
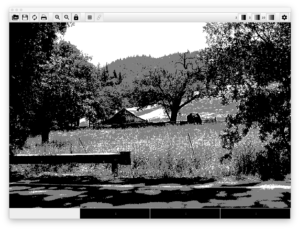
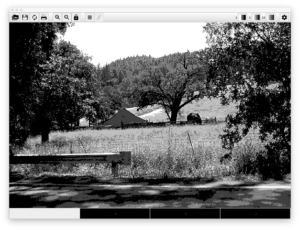
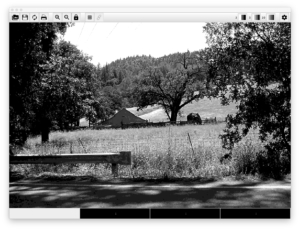
10 ![]() Any image can be converted to 3, 5 or 10 levels of gray. This is handy for seeing the major gray level shapes when designing a composition. It is also a good way to check an existing painting’s composition by taking a shot of the painting and converting to gray levels.
Any image can be converted to 3, 5 or 10 levels of gray. This is handy for seeing the major gray level shapes when designing a composition. It is also a good way to check an existing painting’s composition by taking a shot of the painting and converting to gray levels.
Note: These gray levels include black and white, so there are really only 1, 3, or 8 “intermediate” grays. The 3 levels of gray conversion button was added to the toolbar after all the other previous screenshots were made.
This How-To will undoubtedly be updated and revised as various features of ArtToolsJSw could be added or changed. Please use the comment section below to post any reviews or make suggestions if you purchased and downloaded the app. You can always get back here by clicking on “S. Anthony Studios Website” on the app’s splash panel.
Thank you!
Download $9.99
