It has been over 30 years since I quit doing silkscreen printing and I’ve never bothered to describe the process in writing despite being asked about it at various times, especially recently at the weekend exhibits of my work at 337 Mirada Art. This may be interesting to some, or not!
Silkscreen Basics
Silkscreen printing (synonymous with “serigraphy” and producing “serigraphs”) is one of the simplest methods of creating multiple copies of an artwork image, especially when producing multicolored images. There are many familiar examples of screen printing, from T-shirt images, through printed fabrics in home decoration and clothing, all the way up to posters and even huge billboards. They all use the same basic idea of squeezing or using a rubber squeegee to push ink through a fabric mounted stencil.
Many commercial screen printing operations use a photographic “process” color separation resulting in four separate screens, one for each of Cyan, Magenta, Yellow and Black (CMYK) that result in a photographic printed image like in a magazine or newspaper. There is also “spot” color separation when just two or more bold, distinct colors are desired in the final product.
Photographic screens are coated with either a negative or positive light-sensitive film (or liquid that dries to a light-sensitive coating) and blasted with an arc light through color-separated negatives or positives. The “open” areas of the stencil where ink is supposed to pass are washed out. These methods are a bit too complex and costly in terms of equipment and materials for the average artist, however. I attempted to make a photographic screen once just using a light sensitive liquid and sunlight rather than an arc light, and it was an unmitigated disaster and waste of time and money.
The silkscreen printing process itself, with some variations, is straightforward. I am assuming this is printing on paper (never done a T-shirt!):
- Raise the screen and prop it up temporarily. Usually a long edge of the screen frame is hinged, so the edge opposite the hinges is raised up. The simplest propping method is to loosely screw a 6″ or 8″ thin and flat stick of wood into the side of the frame so it drops down as a support as the screen is raised. Then just flip it back up to lower the screen.
- Place paper in the proper position under the screen. “…proper position…” is the operative term here!
- Lower the screen onto the paper.
- Pour or scoop ink onto the blocked out margin of the screen as evenly as possible so the whole image will be covered by the stroke of the squeege. There may or may not be enough ink already there. Too much ink can create a mess, too little and the “pass” of the squeegee may not completely print.
- Very lightly squeegee the ink evenly over the open areas of the screen—this is the “flood” stroke (sometimes the flood stroke is done with the screen up).
- With a little pressure, squeegee the ink back in the opposite direction—this is the printing stroke.
- Raise the screen and repeat with the next sheet of paper. Often, especially if you need more ink or it is drying out, the paper will stick to the underside of the screen and may have to be gently pulled down (not sideways which will smear the image).
There are a number of variables that work for and against a successful printing “pass”.
- Squeegees are made of 1/4″ thick medium hard rubber strips mounted in a wooden handle. The rubber working edges need to be very straight and even with no nicks and sanded sharp with fine sandpaper to produce an even ink transfer.
- The squeegee should be drawn across the screen at a slight angle – too much angle pushes the ink under the blockout or margin causing a mess.
- Too much pressure on the print stroke can cause the screen fabric to buckle causing the image to smear. The screen must be tight to start with.
- If the weather is warm and/or dry, the ink might have to be thinned slightly to retard drying in the screen and thus blocking the ink from passing through. However, too thin ink can run under the margins and even under the areas blocked out and ruin a print.
- It is also important to keep your hands clean and free of ink — I know this from experience! I have had to toss a lot of prints ruined by ink smudges.
- It helps to have air humidity as even as possible throughout the entire print run of all the colors. A sheet of 22″ x 30″ high-quality printing paper can shrink or expand more than 1/16″ with varying humidity resulting in blurry image margins and mis-registration in the image itself.
Experimentation and experience are invaluable!
How I Started
Sometime around 1979 I saw an article in the now defunct American Artist magazine describing an artist who used transparent inks in multiple layers to create watercolor-like silkscreen prints. The whole process seemed pretty straightforward and fairly simple in terms of equipment and expense. All you need is a wooden frame with a sheer 110 to 160 count fabric stretched on it, a rubber squeegee, some suitable ink, a “blockout” glue to create the stencils, and a stack of paper. I found it a little more complicated than that eventually, but I’ll describe that later.
Since I was, at the time, mostly a watercolor painter the use of transparent inks was especially appealing. Watercolor painting requires thinking from “light to dark” and is almost the opposite of opaque painting mediums. Oil/acrylic painting generally proceeds from “dark to light.” Of course, this is a generality, not a hard and fast rule, but it made sense to me in terms of doing silkscreen at the time.
I started quite small. I did not want to use my expensive 300 lb Arches cold-pressed watercolor paper (then about $4.00 per sheet, now $18.00 per sheet) to experiment but, as luck would have it, Earthquake McGoon’s, where I was performing intermissions for the Turk Murphy Jazz Band in San Francisco, was moving to a new location on the Embarcadero at the exact same time. The new location was the old location of Bellerophon Books, still the publisher of fancy, high-end coloring books, and the owner allowed me to cart off some stacks of 26″ x 40″ unused printing paper, perfect for experimentation.
The first task was to build a screen and hinge it to a plywood base. I say, “a” screen because I did not know it at the time, but most silkscreen printer artists make a separate screen for each color, which would mean that the 30-plus-color editions I produced later would have required way more storage space than I had. Being ignorant, I dodged a storage- space-bullet.
The downside (or upside depending on your ultimate goal) of using a single screen for the whole edition is that the print can never be duplicated because each color layer’s stencil is destroyed when creating the next color’s stencil. The upside is that you can guarantee to your customers that a print is from an “original limited” edition and cannot ever be duplicated.
The next task, actually a decision, was to decide whether to go with solvent-based or water-based ink. I decided on solvent-based ink. There are definite trade-offs here, not the least of which is for health reasons. The ink used and the blockout need to be incompatible, meaning you do not want the ink to dissolve the blockout during the printing process — a situation that would be a complete disaster. On one hand, water-based inks are easy to clean up (unless they dry in the screen) but they require a solvent-based blockout material. On the other hand, the required solvent based blockout is much more difficult to remove, requiring hazardous solvent materials like lacquer thinner. Solvent based inks just needed mineral spirits to clean up and the solvent does not affect the blockout. One company makes a blockout that only dissolves in hot water, but for me that would have required moving the screen to a hot water source which was impractical for my setup described below and besides, the one time I tried using it, it required a lot of scrubbing and did not come out of the screen completely.
So, with my single screen, I tried just experimenting with printing a single simple image with a couple of colors. I mixed regular artists’ quality oils with a transparent base. I quickly discovered that with more than a single color, “registration” or getting the colors and, even more importantly, the edges of the image to line up properly was critical.
To nail all this down, using the original American Artist article as a reference, I started a practice that lasted for the entire time I did silkscreen printing: My screens always had a polyurethane varnish border (which is resistant to almost any normal solvent like mineral spirits) of about 3″ and it never moved in relation to the plywood base; I used three little metal tabs, two at the bottom and one on the left side, secured to the plywood base so the paper would always be placed in the exact same position up against the tabs under the screen every time and for every color. Washing away the blockout (cleaning away the stencil for the next color) was always done “in place” so the screen never moved and, since the blockout was water soluble, the polyurethane margins were not affected. All my prints were hand-color-separated. I used a water soluble blockout (Speedball Drawing Fluid) painted by hand around the areas that I wanted color to be printed. This produced what was essentially a “positive” like a positive film image.
Now I seemed to be gaining steam.
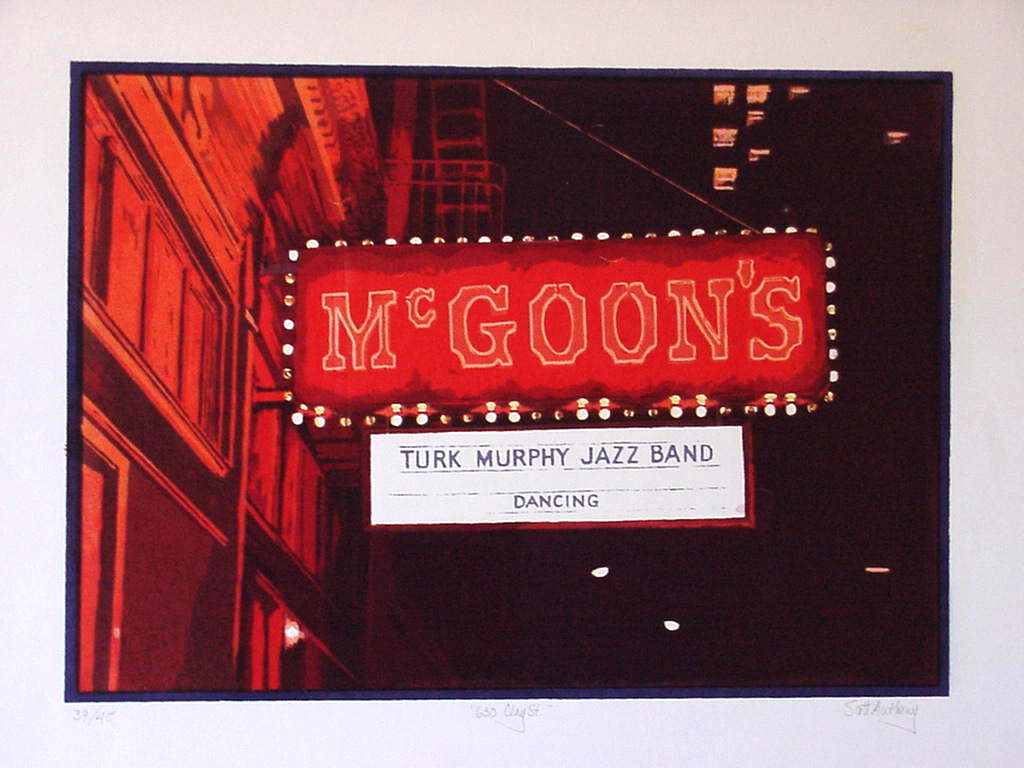
I decided to try a more ambitious project. Linda Jensen (now Bob Schulz’s wife) gave me a photo she had taken of the marquis above the front door entrance of Earthquake McGoon’s just before it closed and moved in 1978. “630 Clay St.” is the result. This edition was still small, only about 45 pieces, but it had a lot of very dark areas many layers thick and was an early challenge with so many colors.
I do not remember the exact circumstances, but around early 1979 I was contacted by a representative of the Richard Mann Gallery in Los Angeles who I assume saw my paintings and first silkscreen projects somewhere. The gallery was interested in commissioning me to do a series of hand-printed editions from my paintings under a new subsidiary of the gallery, Palm Editions. They offered to purchase entire editions of silkscreens of selected paintings plus pay for materials
and in addition, I would retain “Artist’s Proofs” in a number equal to about 10% of the final edition size. In other words, if the edition turned out to be 300 pieces, I would aim for 330 good prints and keep 30 of them labelled “AP”. As a side note, with my method of using a single screen for all colors, “AP” really does not mean anything because there were never any separate “proofs” printed in the first place.
I decided to go for it and signed an agreement to get started. But, before actually printing anything I really needed to seriously upgrade all the physical equipment necessary…
Equipment And Materials
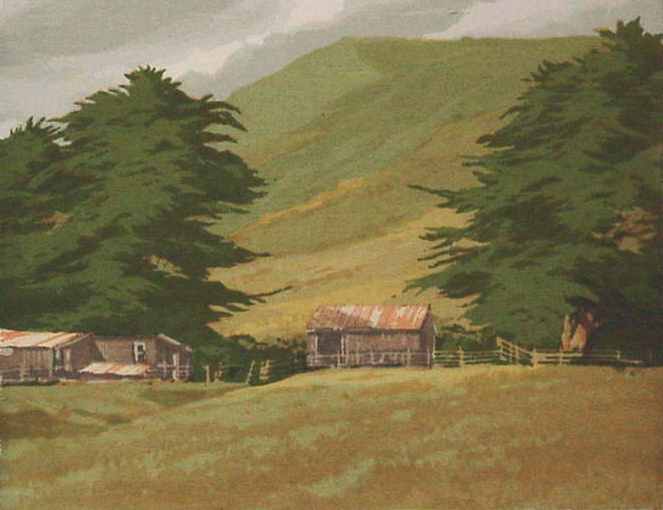
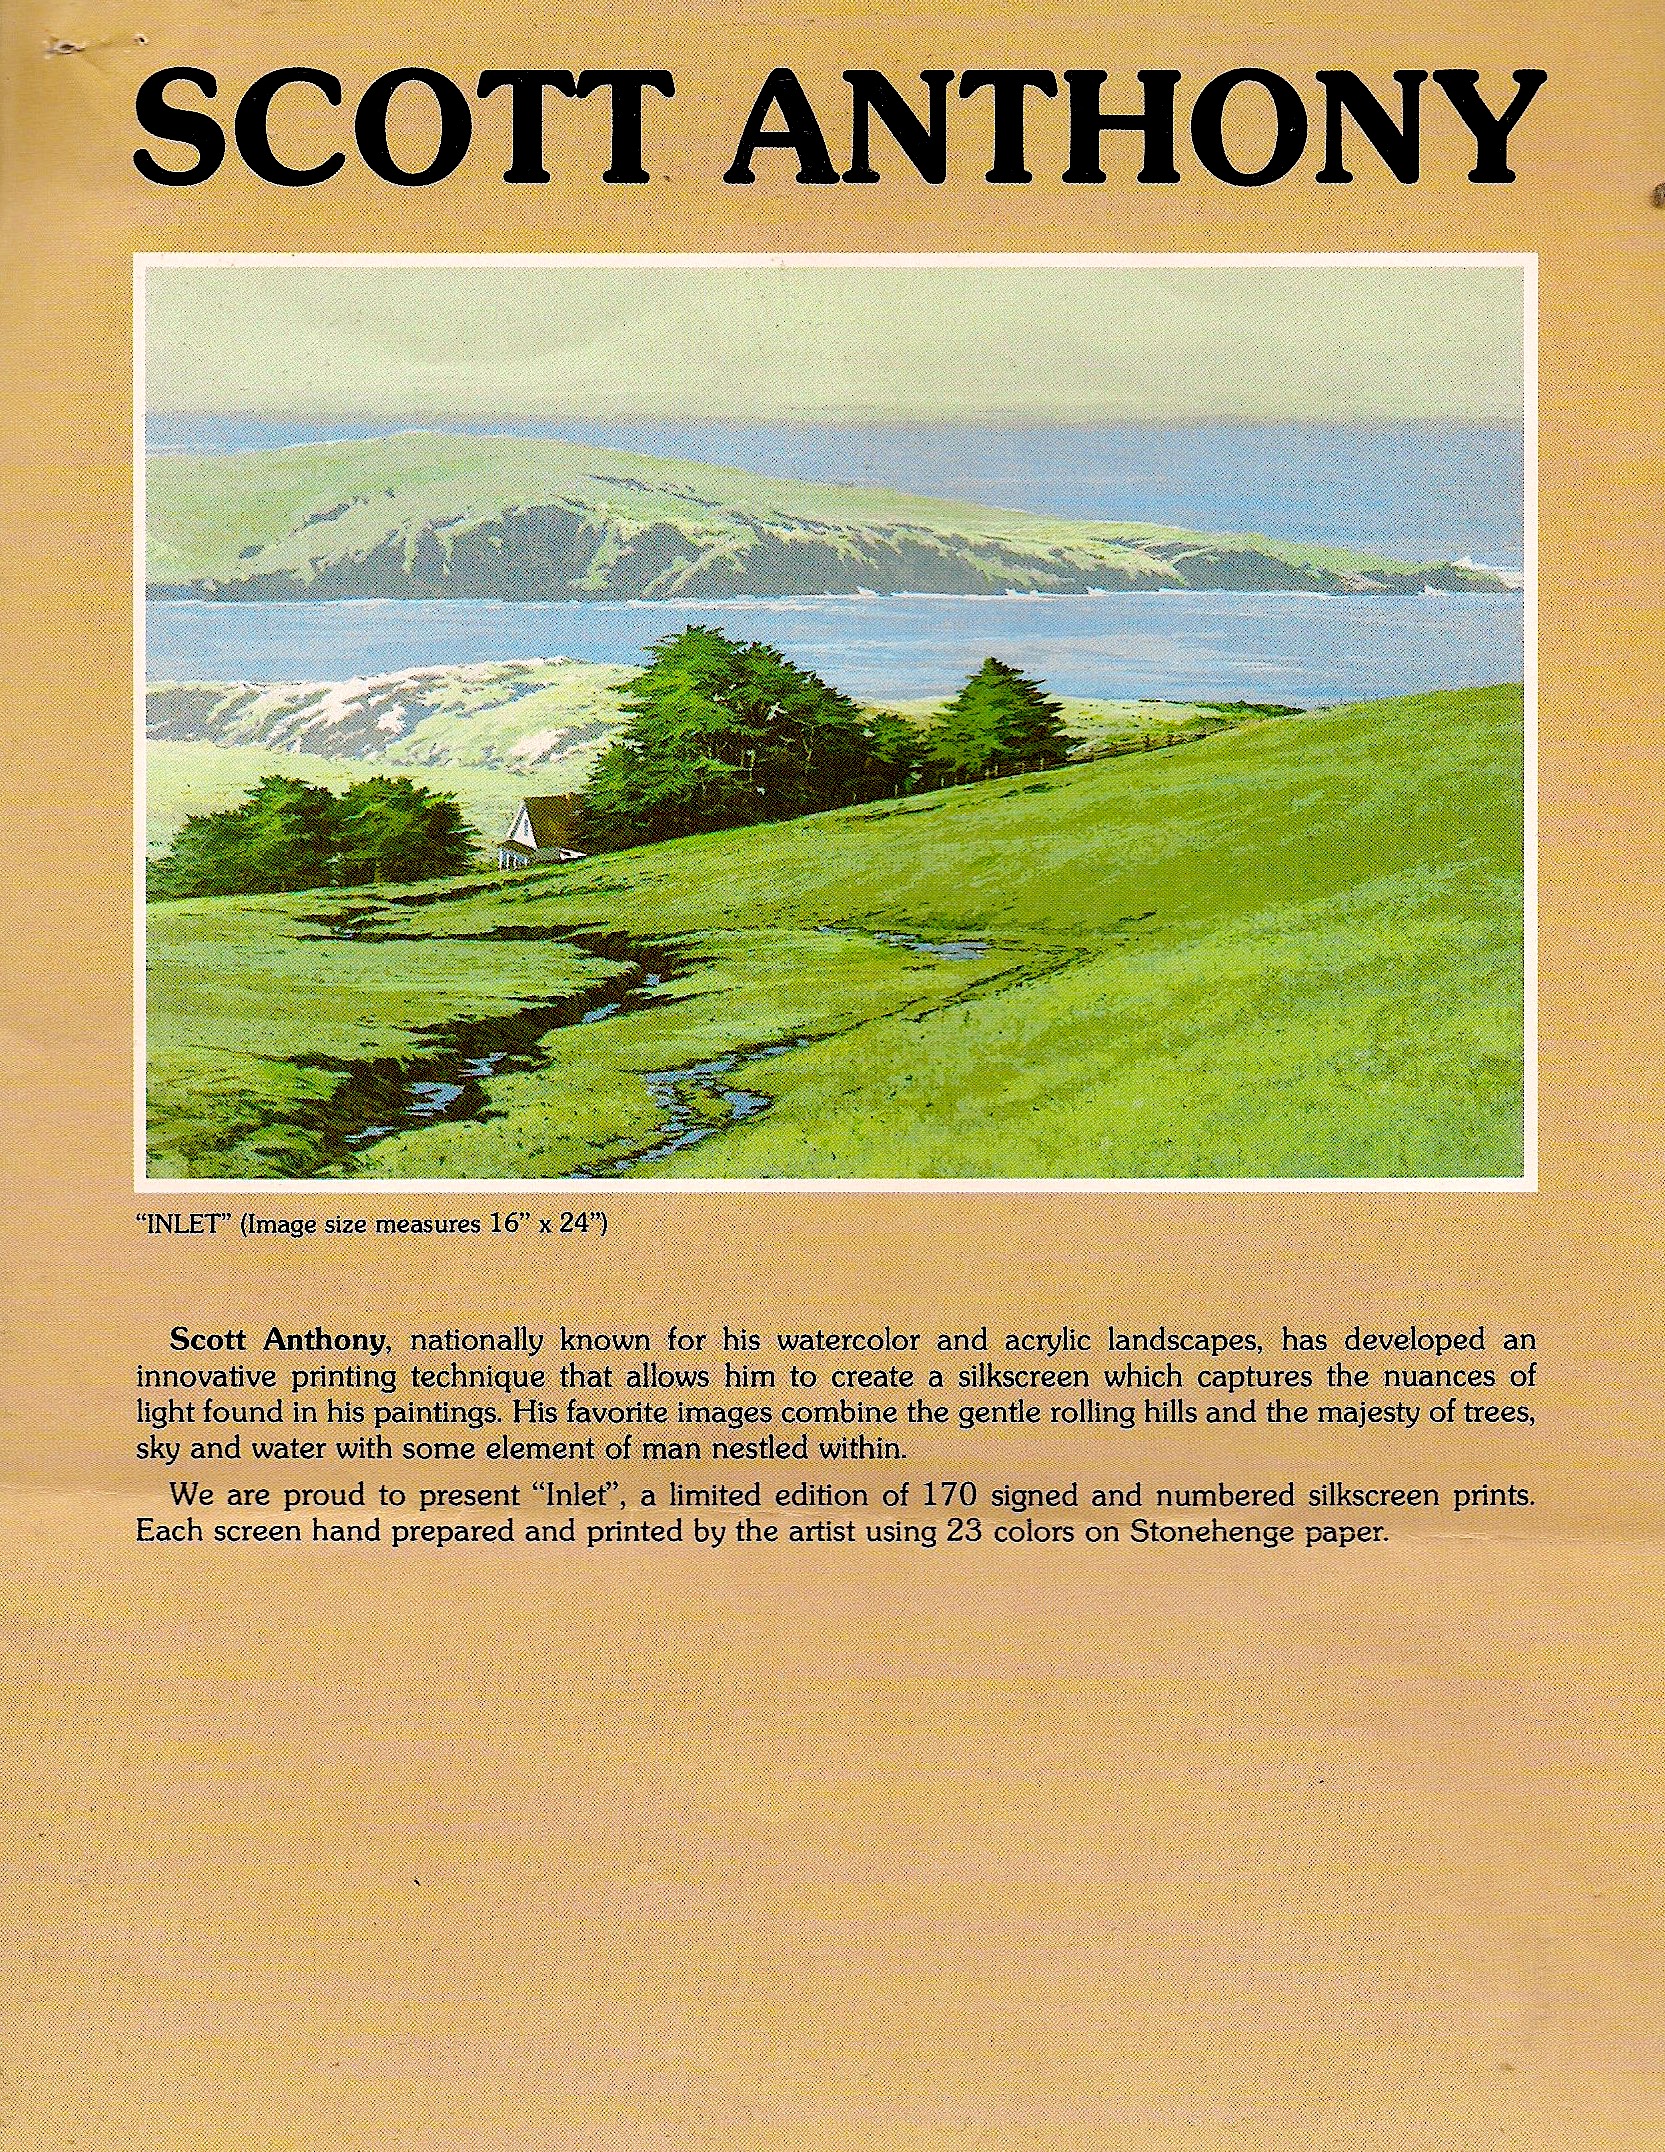
The first painting Palm Editions selected for me to produce as a print was an acrylic on hardboard panel (above), about 16″ x 24″ which was larger than my previous experimental editions. Any silkscreen final image should appear centered on whatever paper is used with about a 2-1/2″ to 3″ margin, so I needed to go bigger with everything. This required, first, a larger screen, second, more substantial hinges (ideally “clamp” hinges specially made for silkscreen print frames) to hold the frame, third, a base larger than the paper, and fourth, a large printing table to work on. I also had to figure out a way to dry 300-plus wet-with-ink sheets of paper.
All this took about a month planning, building, purchasing materials and organizing.
At the time, my studio was the entire open top floor room of the house we had recently built on Potrero Hill in San Francisco. The room was about 18 feet by 18 feet with my painting area in the northeast corner. I used the entire south wall for a printing table made from 2 36″ solid flush doors. I though this would give me enough space to put the stack of paper for the days’ print-run on my right side and the plywood screen base and hinged screen in the middle. It turned out that the stack of paper needed to be far away from my printing area to avoid ink spatter and drips, so I wound up building a rolling table for it eventually.
One final step was required before I could actually get to work — how do you dry over 300 sheets of ink-wet paper? They need to be separated and have enough air flow to evaporate the solvent in the ink (mineral spirits) overnight so another color layer could be added the next day.
My first solution was to string three “clothes-lines” across the entire room, each with 120 Bull Dog clips threaded onto them spaced about 1-1/2″ apart. The clothes-lines needed heavy duty hooks screwed into studs in the wall to withstand the tension on the lines but the system worked reasonably well for the first edition I printed. The main problem was that three-hundred sheets of 100% cotton printing paper is really heavy whether in one stack or spaced out. This weight caused the clothes-lines to sag badly every night while the prints were drying. Lesson one — it is probably a good idea to avoid nylon rope for hanging prints.
There was one (at least) other problem with the “hang-to-dry” method. Every morning when I got back into the studio the mineral spirits fumes were overwhelming. The fumes were also sinking down into the rest of the house and causing concern. So, I bought a 24″ wall-mount fan, cut a hole in the door that luckily just happened to have been designed for a fire-escape deck at the back of the house and mounted the fan in the door. With the fan on you could actually feel the air being sucked in through the front door of the house three floors below! And, thankfully, it completely cleared the air in my studio!
Changes and Refining
After about nine or ten successful print editions for Palm Editions, in 1983 or so Richard Mann’s father-in-law, who owned Fidelity Arts, a world-wide commercial gallery chain based in Los Angeles, took over. They promised I would get a minimum of eight print commissions per year and as a bonus they would purchase outright my paintings that the prints were based on. The big problem, it turned out was that they wanted larger pieces to satisfy their more commercial accounts. This meant I needed larger paper (26″ x 40″ rather than 22″ x 30″), bigger screens, more ink per print and most of all, a different printing and drying system. My hang-to-dry method no longer worked for the larger paper because the Bull Dog clips were not strong enough to hold them and the clothes-lines sagged all the way to the floor. Also, it was almost impossible to print the larger images with a hand-held squeegee. I needed what is called a “one-arm” setup which is the squeegee secured to a handle that rides on a roller-bearing track and can be pushed and pulled sideways easily.
The result was a twofold upgrade and required about a month to build:
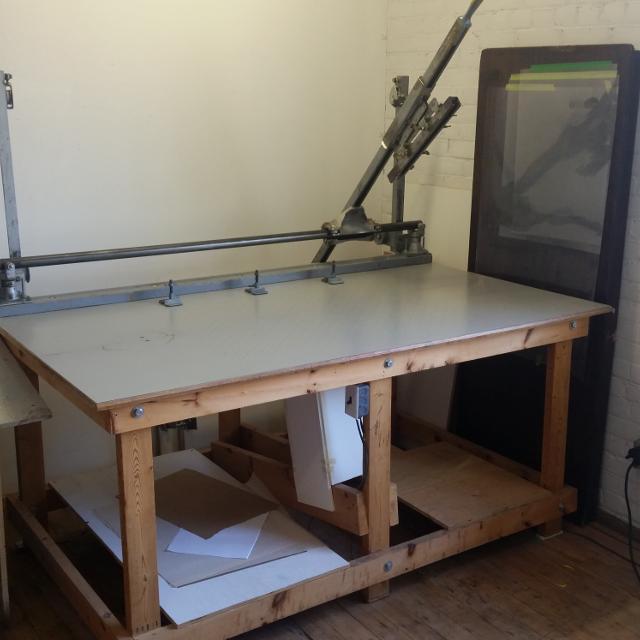
- A “one-arm” squeegee setup like the one pictured above. Thompson Roller Bearings are really expensive, by the way, as is the required custom-machined stainless steel rod that they roll on.
- Also, unfortunately with no picture available to show of it, I kludged together a 46″ wide by six-foot long conveyer belt with 26 250 Watt heat lamps. Our next-door neighbor was an electrician and he ran two 30 amp dedicated lines from the basement to the 4th floor to handle the power required! A freshly printed sheet would be placed on the belt and slowly (but steadily!) pass under the heat lamps that were about six inches above the belt and the ink solvent would quickly evaporate. The dry sheet would drop into a bin at the back end that happened to be right next to the previously described door-mounted fan. It worked like a charm (except for the one time a sheet got stuck and started to char and smoke).
This setup was good for about 20 editions over four or five years.
The Finale Of My Printmaking
This hopefully interesting tale ends here. After I printed around 20 editions of approximately 300 pieces each for Fidelity Arts, they went out of business in 1987 and the company was sold to Circle Art Galleries. After the sale I had no more contact with anyone at Circle that has also gone out of business and have never learned what happened to the inventory of my prints they surely must have inherited. I have seen a number of my pieces on various TV shows and at least one hit movie (“Patriot Games”), so some may have been auctioned off to film production studios’ prop departments. There are also a couple of art dealers on eBay who occasionally post them for sale.
My “bout” of silkscreen printing started as an enjoyable experiment, grew at first to be an equally enjoyable artistic pursuit with Palm Editions but then took a turn when it morphed into commercial art for Fidelity Arts and became a stressful, physically laborious pain in the rear. The sudden end created even more stress financially.
Despite the stress, I am proud of the body of silkscreen print work I created over the period from 1979 to 1987, but I’m also much, much happier painting than printing!
Postcript
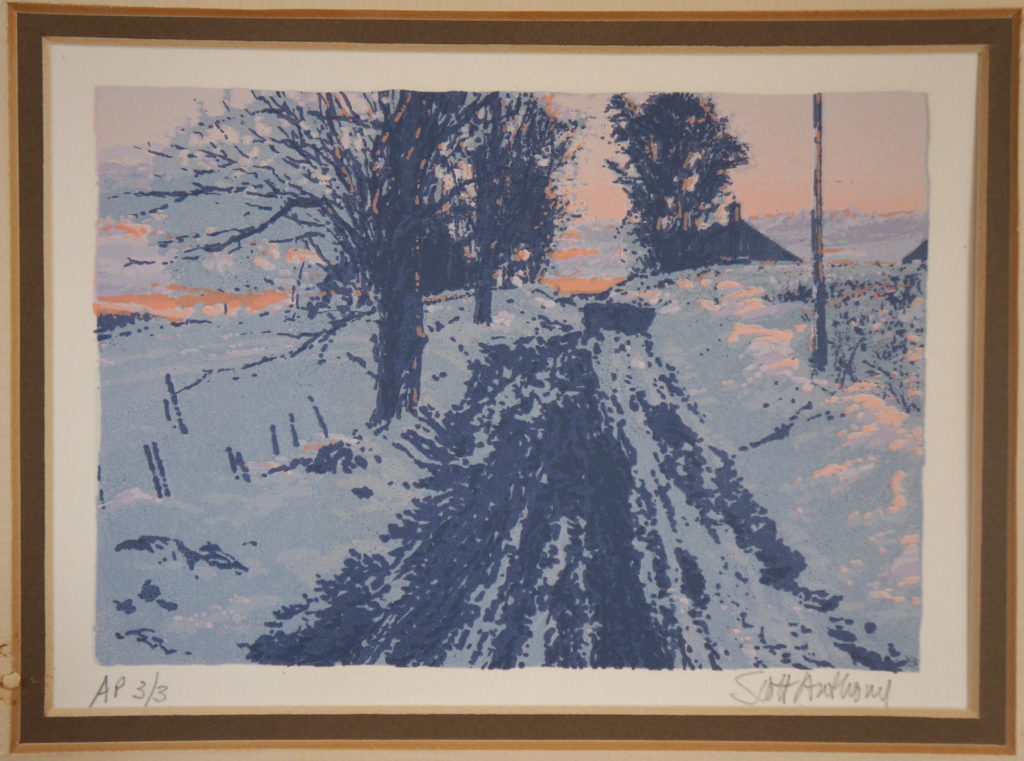
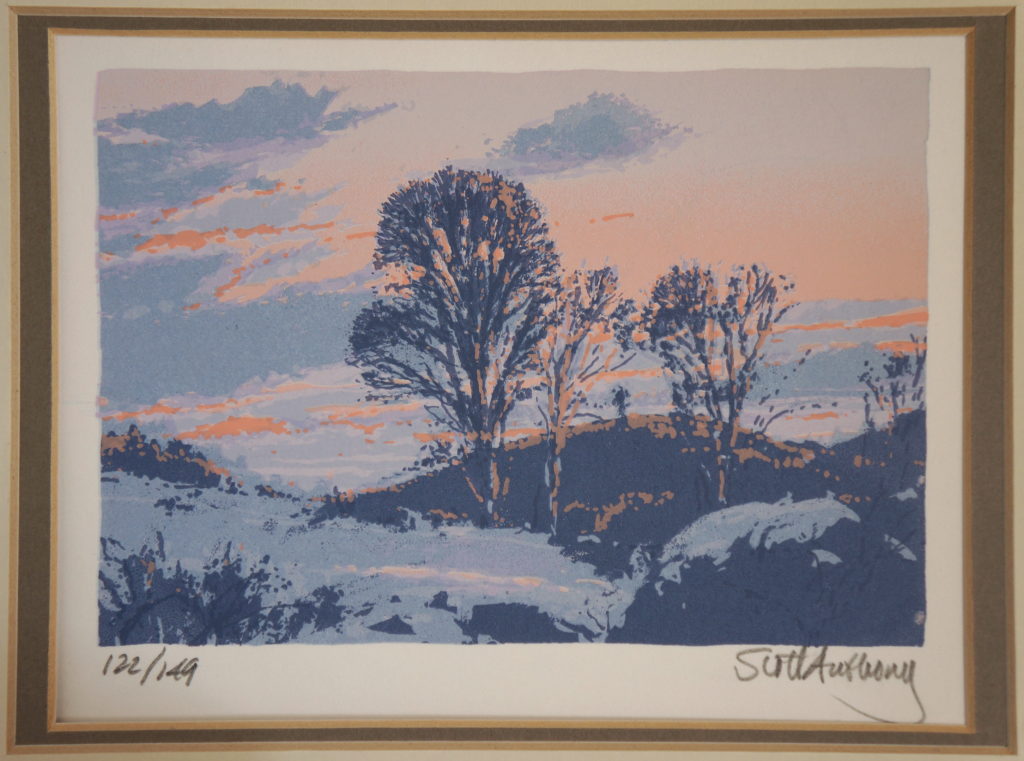
After initially writing this post I discovered a three copies of each of two different Christmas cards I printed about 1980 or 1981. Each image is approximately 4-1/2″ x 6-1/2″ on larger paper. I must have done them at the same time because the seven or eight colors used are identical — almost impossible if they had been printed in different years. They are matted as shown, but will probably need new mats since the mat interior has become darkened with age.
If you are interested in one or both, they are $75 each. Send me a comment and they will go first-come-first-served! Thanks!